Orjatar saw device like this on youtube video and wanted one for her new airbrush. She asked me if i can make one and tell her how to make on too so i figured a way to do it. It's simple and basically free. You can buy one for around 15-20€ but for starters this does just well. Whole build took me around 15 minutess or less.
What you need.
 |
| Required parts. Missing Cloth and piece of wire. |
- Glass Jar
- Kinder egg toy cover or empty bottle
- piece of cloth / cotton swab
- piece of wire or string
- Glue/Epoxy (Optional)
Tools required.
 |
| Tools. |
- Cutter/scissors/knife
- Side cutting pliers
- Small screwdriver
Step 1
Take the kinder egg toy cove. Open it and cut the halves together with your tool of choice. We are only going to use the bigger piece so you can throw the smaller piece away or put it waiting for future projects.
 |
| Halves cut. |
Alternatively empty bottle cut the head off and then remove other side of the bottle.
Step 2
Take the screwdriver and start poking holes to the bigger piece. Random holes randomly all around the thing.
 |
| Sharp screwdriver goes through the soft plastic easily. |
 |
| Holes made. |
|
|
Or poke holes to the cap. First time you go through also the seal usually fly away, you don't need it
 |
| Poke poke poke |
 |
| Group of holes. |
Step 3
Put the half you just poked full of holes on top of the glass jar lid pretty close to the edge (5-10mm off from the edge) and draw a circle around it. You can use the screwdriver to scratch the surface of the lid or pen.
 |
| Doesn't need to be too perfect. |
|
On bottle method you want to use the mouth of the bottle, cap removed.
Step 4
Using the screwdriver, poke holes around the inside of the circle you just made. Trying to keep the inner edge of holes on the line.
 |
| Time to poke more holes. |
And you should end up having holes in circle when you are done.
Step 5
Take the cutting pliers and cut off between all the holes so you can free the piece in the middle. Depending how small and sharp your cutters are you can cut it straight away or you might need to help with screwdriver bending upwards later.
 |
| Cut cut cut. |
 |
| We have a hole. |
|
Step 6
Now it's time to put the kinder egg half partially through the lid, only the part that would go inside the other half. Depending how your hole is it might be bit tight so you might need to bend the edges inside using the side of pliers or if you have a file you can file the edges smoother. When you get it in place it should look something like this. If you have gaps along the edge now you can use some glue or epoxy to fill those in.
 |
| Toy cover half in place. |
Alternative way with bottle. Screws in nicely with the threads.
Remove rest of the sealing ring from the cap and screw it in place tightly.
Step 7
Now we need to make the filter to stop most of the paint vapor flying around. Take your piece of cloth or cotton swab and shove it inside the kinder half.
 |
| Cotton swab i used. |
 |
| Filter cloth inside the half. |
|
 |
| Cloth in the bottle Was tight enough for not needing the securing thread. |
And then you need to secure the cloth so it doesn't fall so easy. Put piece of wire/string through the egg half under the cloth and make a knot/twist on the outside.
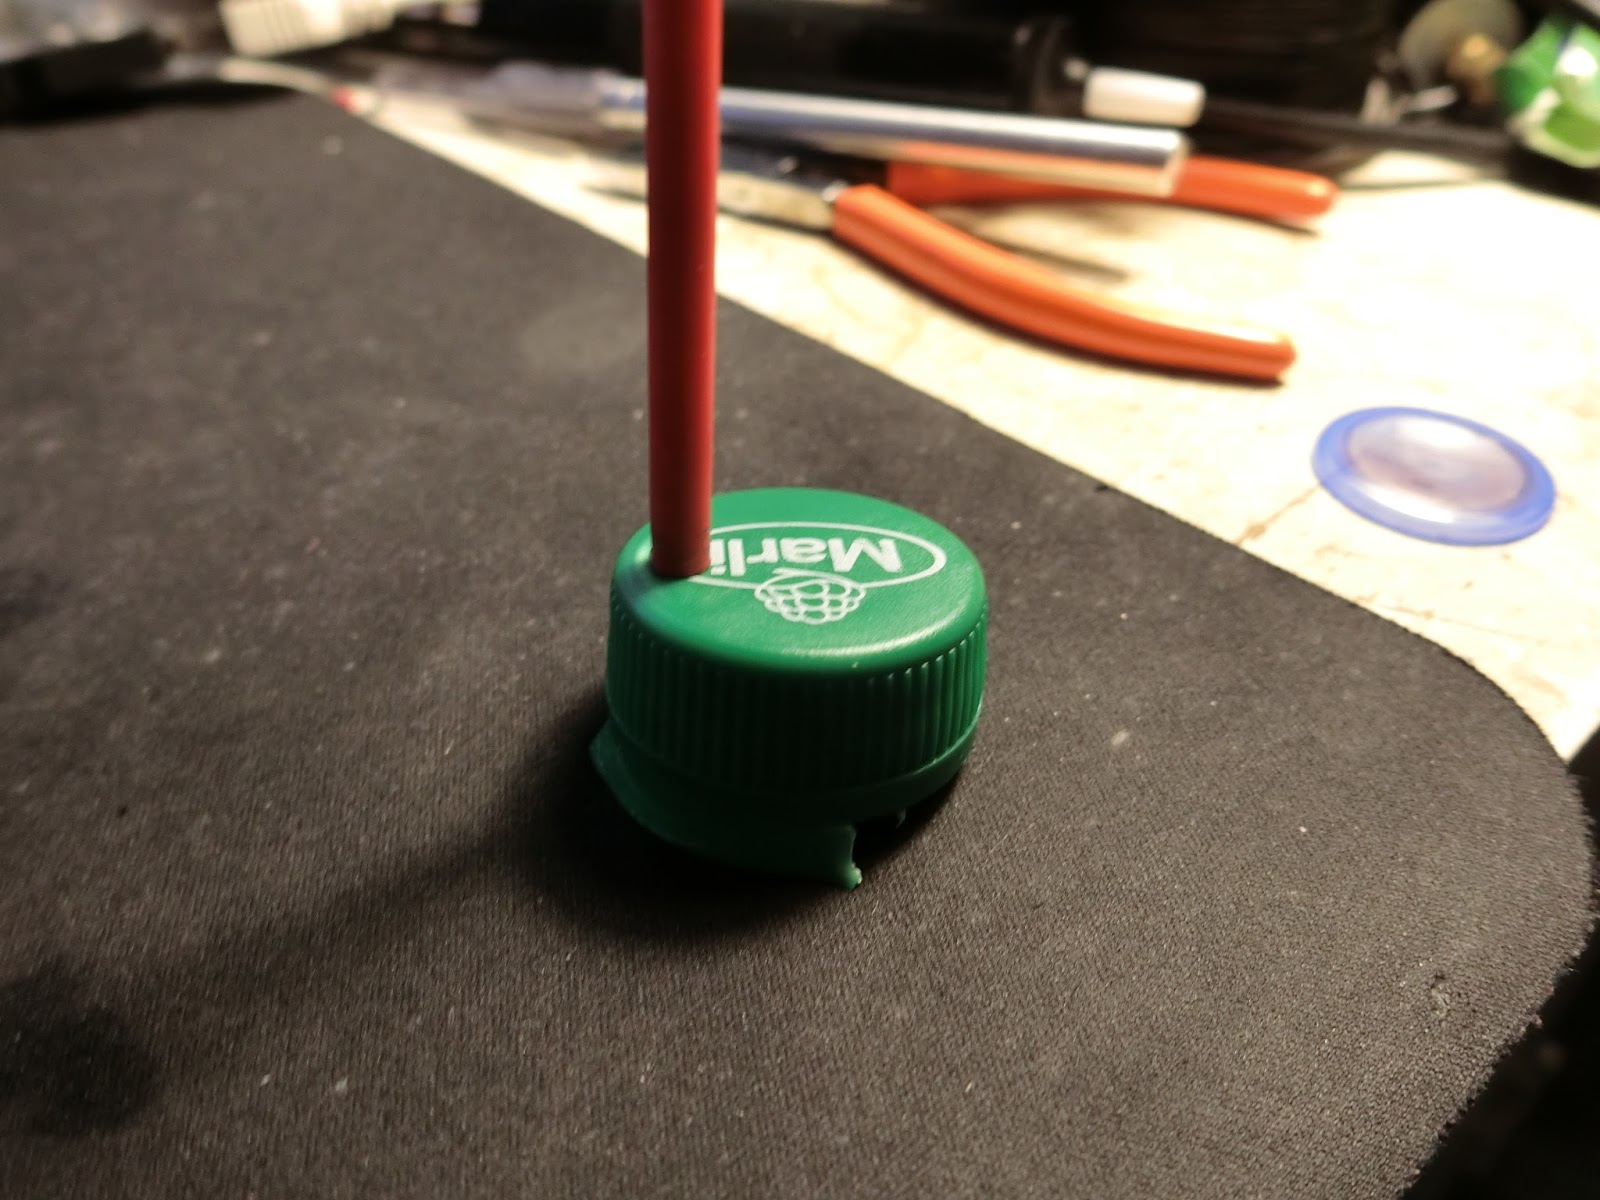
Step 8
Using the screwdriver poke more holes to match the size of the tip of your airbrush. I made square formation of 4 holes and removed the piece with pliers.
 |
| Here comes the hole. |
Finished
Now you are done with the airbrush cleaning jar. Doesn't look the best but it should work just well. I used my crafts cutter to simulate the airbrush since i don't have mine here.
Now go and have fun.


No comments:
Post a Comment